Motorola
General steps on connecting a Motorola Commerical DMR Repeater to BrandMeister.
For a list of supported Motorola Repeaters and the firmware versions please visit the Motorola Page under Repeaters on the BrandMeister Wiki at http://wiki.brandmiester.network
Configuration Information
- Open Motorola CPS (Customer Programming Software).
- Open the General section and then General Settings section in CPS and set the following information:
- Radio Alias: Set it to call sign. Note: Please enter Call Sign first and then any text following if you wish to add more info such as location or name. You can use a Dash or space to separate the additional information -- Example: W1AW - City Name or W1AW-2 2. Radio ID: Set to the assigned 6-digit Radio ID3. Under the General Settings section in CPS scroll to the CWID section and set your CW ID information.
- ID: Set it to call sign
- TX interval: Set this to 10 (ten minutes)
- Open the General section in CPS and set the following configuration item in Link Establishment section:
- Link Type: Set to PEER
- Authentication Key: Enter the Auth Key you set in BM Device Password - See Device Password if you have not set this. (This is a hex value, 40 chars or less).
- Master IP: Enter the preferred IP Address of the
Master Server you wish to connect to. - Master UDP Port: Enter 55000 (not needed but can be set to this)
- UDP Port: Enter 55000
- Open the Zone/Channel Assignment section and then click the zone folder. Click on the channel to be used and verify the following configuration is set at minimum. Other options are up to you on how you are configurating your repeater:
- IP Site Connect (Repeater): Set to Slot 1 & Slot 2
- Repeater RSSI Threshold: Set to -100 or higher
- Write the code plug to your repeater and your repeater should now connect to the master server of choice.
1. Open Motorola CPS (Customer Programming Software).
2. Open the General section and then General Settings section in CPS and set the following information:
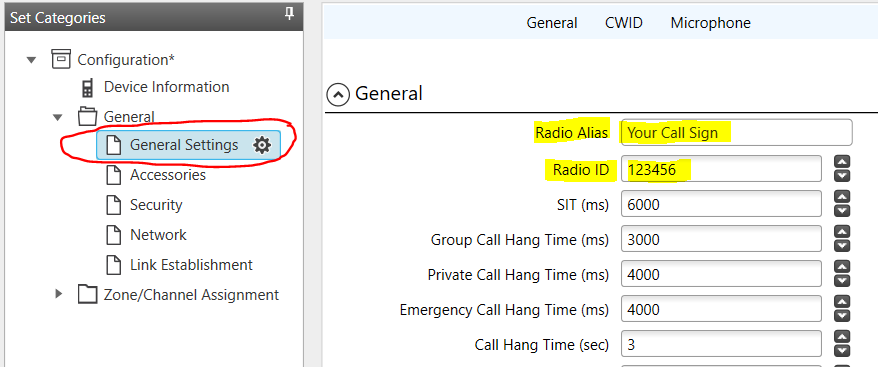
Radio Alias: Set it to call sign. Note: Please enter Call Sign first and then any text following if you wish to add more info such as location or name. You can use a Dash or space to separate the additional information -- Example: W1AW - City Name or W1AW-2
Radio ID: Set to the assigned 6-digit Radio ID
3. Under the General Settings section in CPS scroll to the CWID section and set your CW ID information.
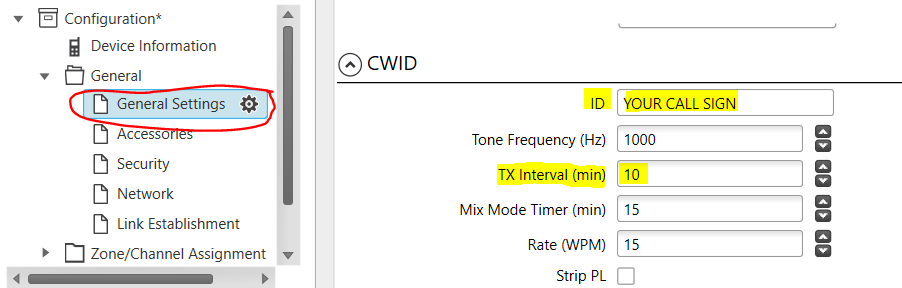
- ID: Set it to call sign
- TX interval: Set this to 10 (ten minutes)
4. Open the General section in CPS and set the following configuration item in Link Establishment section:
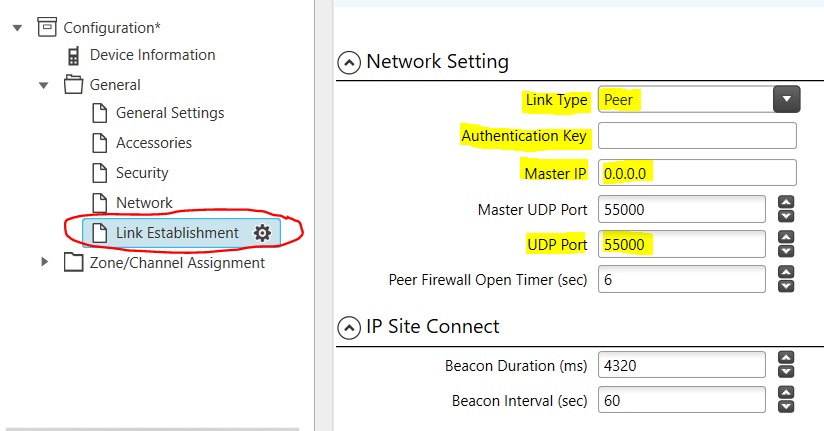
- Link Type: Set to PEER
- Authentication Key: Enter the Auth Key you set in BM Device Password - See Device Password if you have not set this. (This is a hex value, 40 chars or less).
- Master IP: Enter the preferred IP Address of the
Master Server you wish to connect to. - Master UDP Port: Enter 55000 (not needed but can be set to this)
- UDP Port: Enter 55000
5. Open the Zone/Channel Assignment section and then click the zone folder. Click on the channel to edit and then click on the edit icon (pencil).
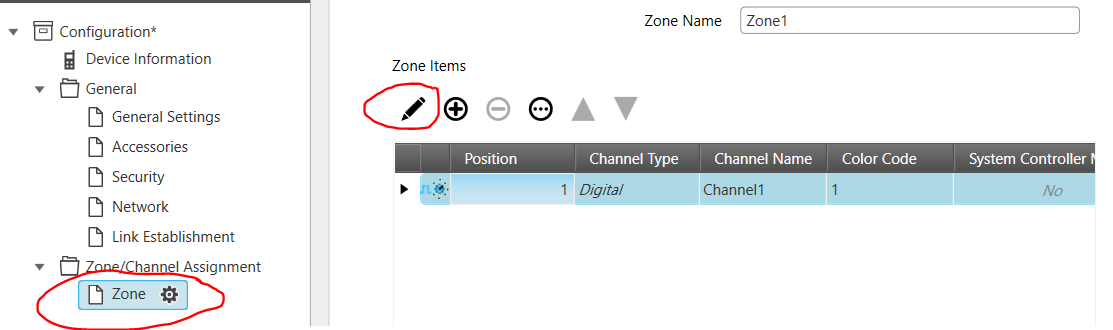
Set the following items below for the channel when in edit mode under the General Section of the channel.
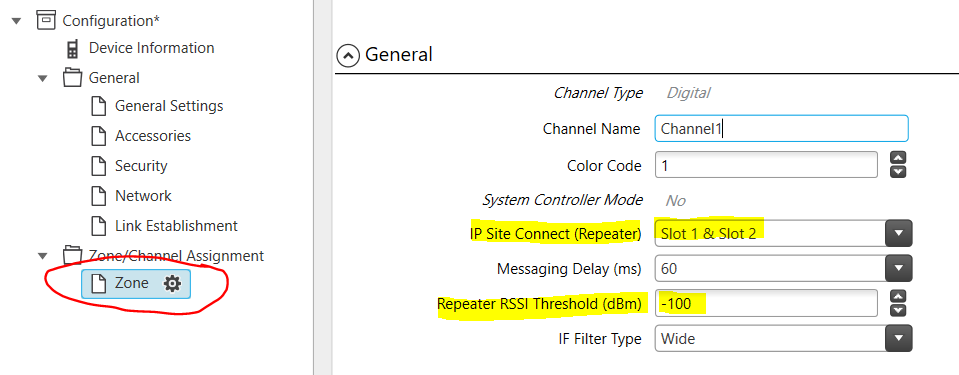
- IP Site Connect (Repeater): Set to Slot 1 & Slot 2
- Repeater RSSI Threshold: Set to -100 or higher
Under the RX/TX section enter information for your area/repeater.
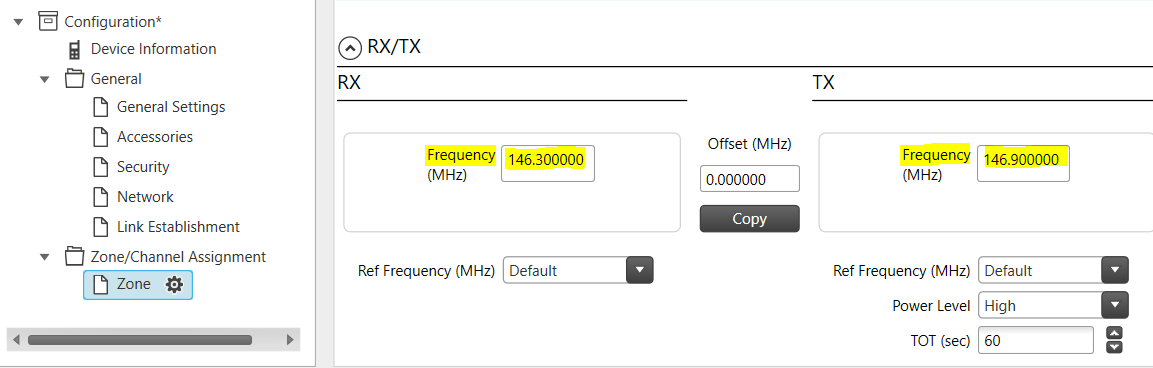
- Enter your RX and TX Frequency.
- Set any other settings as desired.
6. Write the code plug to your repeater and your repeater should now connect to the master server.
Verify Connection and Sysop Permissions
- Verify connection by going to the BrandMeister website at http://brandmeister.network and click on repeaters and search for your repeater by the 6-digit Radio ID or by the Callsign of the Repeater.
- Look at Sysop Dashboard guide for features and other information.
List of Master Servers
To see a list of all master repeaters visit http://brandmeister.network and click on the Masters link on the left navigation.